This article will teach you how to import past real estate syndication distributions to an asset/fund.
The Distributions feature is a premium feature. Contact our support in order to add it to your account.
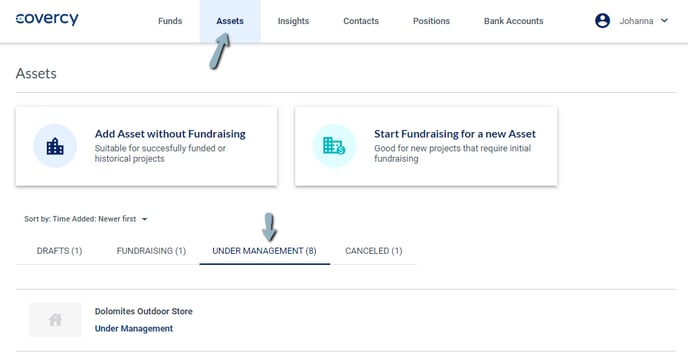
- Click the "Assets" tab in the top navigation in your Covercy account, and navigate to the Under Management tab / Drafts tab.
- Click on the asset or fund to which you want to import distributions.

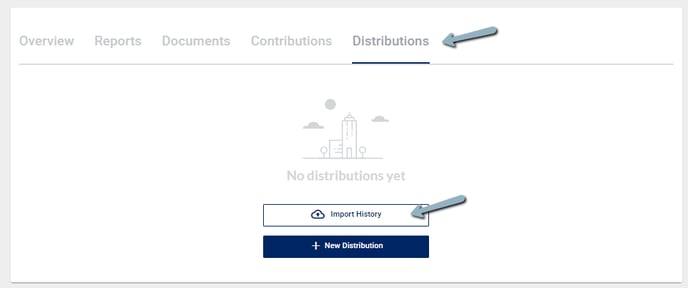
- On the asset/fund page, navigate to the "Distributions" tab, and click the "Import History" button.

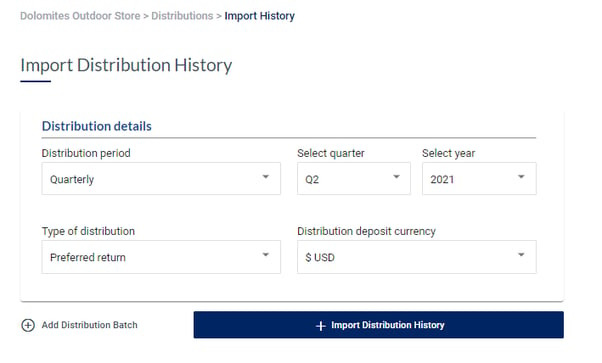
- On the Import Distribution History, fill out the basic details about the distribution.

- To import multiple distribution at once, click the "Add distribution batch" button at the bottom left, and another distribution will be added to the list. Fill it's details too.
- To remove a distribution batch, click the remove button at its top-right corner.
- When you are done setting up the basic information for each distribution, click "Import Distribution History".

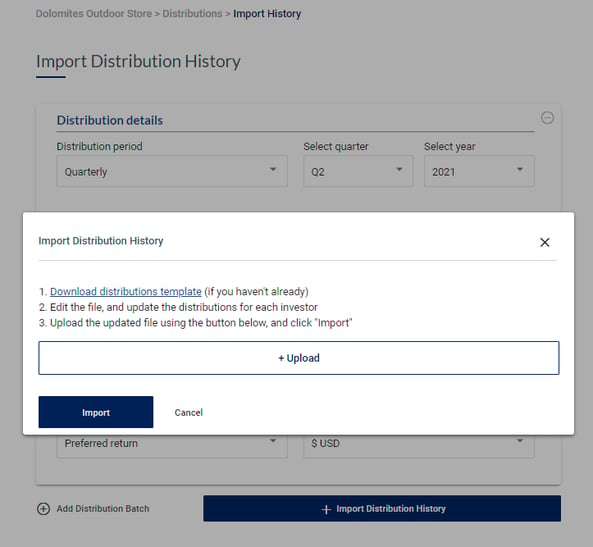
- A dialog window will appear, with instructions on how to continue from here.
- Download the excel template which was generated based on the details you provided.
- Open the excel file. Each row in it represents an inestor in that asset/fund.
- Enter the amounts per investor, and per distribution (in case you added multiple distributions). You can leave a row empty if you don't want to transfer money to that investor, on that distribution. The columns you can fill are the Gross Amount, Tax Amount and Adjustments, and you will see the Net amount column being calculated accordingly.
- Save the excel file, and upload it back to the system using the "Upload" button.
- Click "Import", and if there are any errors or information that wasn't correctly inserted to the excel, details about the error will appear.
- If needed, fix the excel, save it again, clear the file uploader, upload the file again, and click "Import".
- The distributions will be imported successfully, and you will be able to view them in the "Distributions" tab of the asset.
